Backing up XBMC Live 10.0 configuration to network CIFS share
The last several posts have described my foray into HTPC territory. My XBMC Live installation is humming along nicely on the Zotac ZBOX HD-ND02, and we are thoroughly enjoying it. Although the installation of XBMC Live was quick and painless, I have made quite a few changes to the skin settings, media paths, SSD settings, and have lot of data loaded into the databases. Getting this all set back up from scratch would take some effort (if I could even remember what was changed) in the event a complete re-installation was needed. Consequently, a scheduled backup of the important data was needed.
What to Back up?
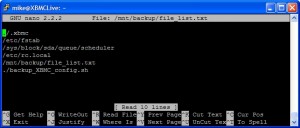
First, though, I needed to figure out exactly what was important to copy off. Obviously the .XBMC folder needed backed up in its entirety as that contained all the XBMC-specific files. In addition, any other system file that was modified needed backed up. I’m not sure what system files were changed automatically, but the following files were changed by me:
/etc/fstab
/etc/rc.local
/sys/block/sda/queue/scheduler
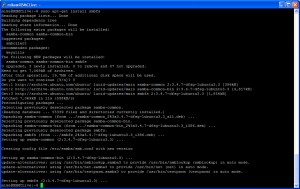
The first thing I needed to do was install SMBFS on XBMC. At a command prompt type: sudo apt-get install smbfs. Respond ‘Y’es to the question, and let it run. It’ll take just a minute or two to complete.
Network drive to backup to
The data would be backed up to a share named XBMC_Backups on my OpenFiler virtual machine. To be able to mount this drive during the backup process (we only want to mount the share for the duration of the script, to minimize needless network traffic), I needed to create an entry in fstab in addition to creating a mount point.
mkdir /mnt/backup
sudo nano /etc/fstab
The entry has noauto so the share is not mounted at boot. I also used OpenFiler’s static IP address, instead of its name, to minimize potential problems for me.
We’ll want to backup a list of folders and individual files, so I created a text file named file_list.txt in /mnt/backup. This will make it easier for me to add files in the future if other important ones are uncovered. Plus it makes the script a little less confusing.
Test the commands manually
I tested the commands via the command line before adding them to the script. I first mounted the backup share:
mount /mnt/backup.
Then I ran the tar command:
tar zvc -T /mnt/backup/file_list.txt --file /mnt/backup/xbmc-`date +\%Y\%m\%d_\%H\%M\%S`.tar.gz
This took a minute or so to churn through all the files, but in the end, a shiny new tar.gz archive showed up on the network.
The script
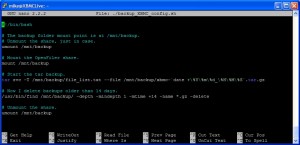
The script itself is straightforward. I named it ./backup_XBMC_config.sh.
# The backup folder mountpoint is at /mnt/backup.
# Unmount it to ensure it is not already mounted.
umount /mnt/backup

# Mount the OpenFiler share.
mount /mnt/backup

# Start the tar backup using gzip compression.
tar zvc -T /mnt/backup/file_list.txt --file /mnt/backup/xbmc-`date +\%Y\%m\%d_\%H\%M\%S`.tar.gz

# Now I delete backups older than 14 days.
/usr/bin/find /mnt/backup/ -depth -mindepth 1 -mtime +14 -name *.gz -delete

# Unmount the share.
umount /mnt/backup
I then gave everyone the ability to execute the file.
sudo chmod 777 ./backup_XBMC_config.sh
I manually tested the job out.
sudo ./backup_XBMC_config.sh
Next I needed to add this job to the crontab.
sudo crontab -e
The job will run at 3am on M, W, Sat so I added the following line to the crontab file:
0 3 * * 1,3,6 ./backup_XBMC_config.sh
And that is it. The job runs three times a week, sending a gzipped file to the OpenFiler backup folder. It also deletes any file older than 14 days with a .gz extension.


Hi there, G8 script but as im a noob at linux i was wondering how would i restore the backup?