Tuning a Solid State Drive (SSD) on XBMC Live 10.0 HTPC
I have a Kingston SSDNow S100 SS100S2/16G 2.5″ 16GB SATA II Internal Solid State Drive (SSD) in my home theater PC. Although this was my first actual taste of a SSD, I understood that TRIM must be enabled on the drive to keep it performing smoothly for the long haul. Otherwise it would gradually decline in performance, and that would not be good.
In this post I will describe what changes were made to my XBMC Live installation. There are countless sites that describe how to enable TRIM, but I found one especially helpful. This site was cptl.org. Much of this post was based upon information on those pages but specifically directed at the XBMC Live 10.0 standard installation.
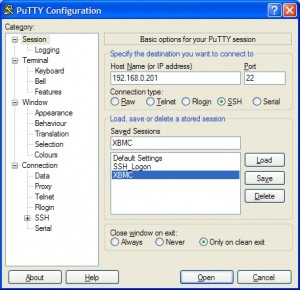
PuTTY
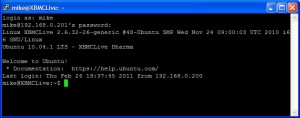
You need to get to the command line to make these changes. For me, it was easiest to just SSH into the machine. For this, I use PuTTY.
Once you enter your user id and password, you are at the command line and can do the serious work.
Enabling TRIM Support
There were two options that needed to be added to the SSD’s mount information found in /etc/fstab, “discard” and “noatime”. What the “discard” option does is tell Linux that you wish to enable TRIM support. “Noatime” prevents Linux from updating the last-access time for files and directories, which saves a ton of writes.
sudo nano /etc/fstab
Add "noatime,discard" to the /dev/sda1 entry, then save and exit the file.
Next, you can remount the SSD.
mount -oremount /dev/sda1
Swappiness and noop disk scheduler
The swap file is not really needed on my system. XBMC uses only a small percentage of the available RAM, and I don’t plan to use hibernate due as 1) the machine boots in less than 20 seconds, and 2) it is on 24/7. To keep Linux from swapping to disk except in the most extreme circumstance, I changed the “swappiness” setting to 1 (0-100 is the range) from the default of 60.
There are a variety of disk schedulers Linux can use. I am using a solid-state device, where all seeks take exactly the same time. Consequently, using a scheduler that reorders I/O requests to group by location on the physical drive does not make sense. I changed the default scheduler, cfq, to be “noop”. Noop disk scheduler simply inserts all requests in FIFO order.
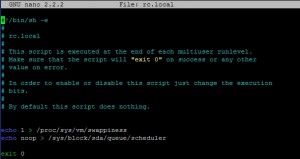
sudo nano /etc/rc.local
Add the lines:
echo 1 > /proc/sys/vm/swappiness
echo noop > /sys/block/sda/queue/scheduler
Save and exit the file. This file will get executed each time the machine reboots.
These few tweaks should ensure my solid state drive stays fast for many years.


Hi there,
did you actually test whether the trim is working or not on it with something like this http://sites.google.com/site/lightrush/random-1/checkiftrimonext4isenabledandworking ?
I have the very same ssd as yours and with ubuntu maverick ( kernel should support trim ) I don’t get it working. My box is a zotac zbox.
You know, I did not test it. I went under the assumption that it just worked. Provided I followed your link’s instructions properly, it seems trim didn’t get enabled on my ssd either. When time permits, I’ll do further investigation and update this post with my findings. Thanks for the link, Tommaso.
You must at least have kernel 2.6.33 for TRIM to work on linux. XBMCLive is based on ubuntu 10.04 and have kernel 2.6.32 therefore you must either recompile a newer kernel or wait for an updated XBMCLive.
Just regarding the swap file settings, it’s a lot easier to just remove the “swap” partition from the boot drive when installing xbmc!