Setting up an NFS share to receive ESXi 4.1 VM Backups
Introduction
All the datastores on my ESXi box are local currently. In order for me to effectively back up virtual machines, an external datastore was needed. I chose to use Network File System (NFS).
None of my virtual machines are mission critical but I do have several that would require some effort to reinstall and get back to where they were. I could manually backup the vms as necessary but realize that automated tasks have a far greater chance of getting done than relying on memory or manual tasks. Automation has served me well in the past. This document covers how to set up an NFS share on a Windows machine, and how to create a datastore on ESXi linked to it.
Obtaining the group and password files
Setting up NFS requires the group and passwd files from the ESXi server to be located on the NFS Windows machine. This requires a connection to the Tech Support Mode command line interface.
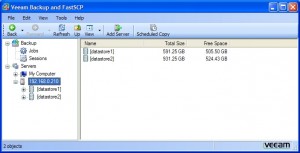
Start up Veeam Backup and FastSCP, then select Tools -> PuTTY.
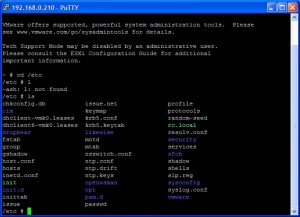
Log on with the user and password. I chose to copy the files to the ISO folder on datastore1 to make it easy to move elsewhere.
- 1. Type ‘cd /etc‘.
2. Type ‘cp passwd /vmfs/wolumes/datastore1/ISOs‘.
3. Type ‘cp group /vmfs/wolumes/datastore1/ISOs‘.
I then copied these files to my Windows machine, named DUALBOOTXP (right-click -> Copy in Veeam’s Explorer windows).
Installing Windows Services for UNIX (WSFU)
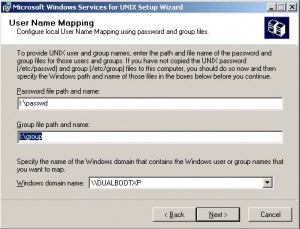
I downloaded Windows Services for Unix 3.5. NFS was to be set up on my backup machine, an older single-core machine with four hard drives. There was plenty of available space on a 1TB drive, so a folder was created on it named ESXi-Backups. I installed both the NFS client and NFS server on the designated machine (DUALBOOTXP). The locations of the passwd and group files from above are needed during the installation.
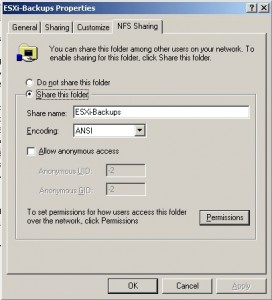
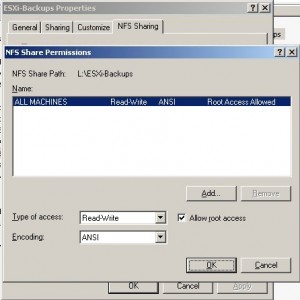
When installation is complete, you can right-click on the folder, select Properties, and you’ll see a new tab (NFS Sharing) is now available. Click on that tab and share the folder off. I named it ESXi-Backups.
Select Permissions. Change type of access to “Read+Write”, and select to allow root access.
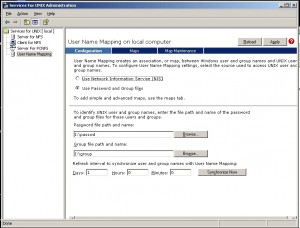
Now go into UNIX Administration by START -> Programs -> Windows Services for UNIX. Select User Name Mapping.
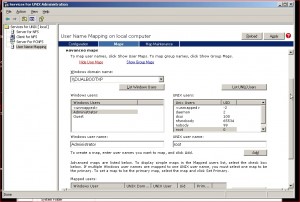
Click on Maps. Click on List Windows Users and List UNIX users. Highlight Administrator from the Windows side, and root from the UNIX side. Click Add. Click OK to each question. Then click Apply.
Open Port 2049 in your Windows Firewall [IMPORTANT ITEM #1!]
Not doing this wasted a good thirty minutes. NFS datastore creation always failed until I disabled the firewall. Suddenly it worked. A quick Google search showed that you need to open port 2049 for NFS servers. I reenabled the firewall, opened the port, added the datastore and everything worked fine. But I get ahead of myself.
Create an NFS Storage VMKernel Port in vSphere [IMPORTANT ITEM #2!]
You will need to create a new VMKernel port. This was the first gotcha for me. It took me at least two hours over the course of several days to figure out these steps. I hope this saves you some time.
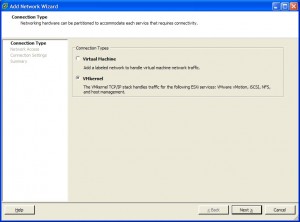
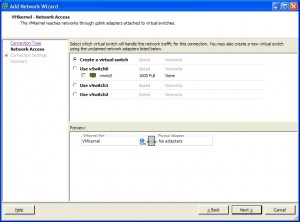
- 1. Go to Configuration -> Networking -> Add Networking. Select VMkernel as the connection type.
2. Create a virtual switch.
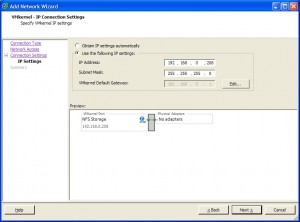
3. Name the label NFS Storage.
4. Give the port a valid, unused, IP address within your domain.
5. The new VMkernel port will now show for you. You still have one more task to get it to work properly.
Go back into PuTTY, and log on to the Tech Support Mode.
- 1. Type ‘esxcfg-vswitch -A VMkernel vSwitch2‘. vSwitch2 is the switch that was just created.
2. Type ‘esxcfg-vmknic -a -i 192.168.0.208 -n 255.255.255.0 VMkernel‘. 192.168.0.208 is the IP used in the previous step.
3. Type ‘esxcfg-route 192.168.0.1‘. This is your network gateway.
Now you are ready to add the datastore.
Configuring ESXi to mount the NFS share as datastore
Next up was configuring the VMWare server to see the NFS share as a new datastore.
- 1. Open vSphere client.
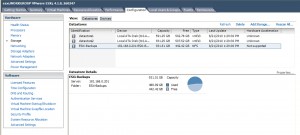
2. Select the Configuration tab, then Storage.
3. Add Storage.
4. Select Network File System.
5. Enter the server name (or IP address- I used the IP address), the folder name you shared off, and the new datastore name.
6. Click Next, then OK.
That is it for installing and setting up the NFS server and shared folder. My next post will describe setting up ghettoVCB.sh for automated virtual machine backups.

Hi, what kind of performance (MB/sec) do you get? I installed NFS on windows server 2008 R2 and i get really poor speed when backing up files (i am using ghettovcb too) from my esxi to the windows nfs share, around 4.0 MB/sec.
I am seeing between 8 and 12MB/s backing up to my share with ghettovcb. The backup target is an ‘ancient’ 1.6Ghz single-core, and I have folder compression turned on, so that could account for some of the slowness.
For giggles, I just moved an .ISO from a Windows machine to the share directly and got a peak of 24MB/s. The same .ISO moved from within Vsphere’s datastore browser peaked at 13MB/s.
This is beautiful! Worked like a charm.
It’s worth noting that if using Windows Server 2008 the Unix Services do not support User Name Mapping anymore, which means you need to either have a 2003 host handy where you can install the User Name Mapping portion, or else you need to integrate UNIX name mapping into your Active Directory.
Yeah. I know.
Hello,
tried the same with esx 4.1i but console gives the following error: esxcfg-vmknic -a -i 10.5.0.113 -n 255.255.255.0 VMkernel
Error performing operation: Sysinfo error on operation returned status : Address not available. Please see the VMkernel log for detailed error information
Any ideas?
Kimmo,
My first thought is to make sure the VMKernel port was built properly. This was a source of head-scratching for me during this process.
HI,
i have the same problem. I can´t find any mistake in the vmkernel port configuration.
Can anybody help me plaese?
Thank you!
Timo
Same problem too!
“Error performing operation: Sysinfo error on operation returned status : Address not available. Please see the VMkernel log for detailed error information
“
you need an extra ip address just for the nfs connection because the host address is already taken
so for a given host using nfs storage for vm guests you need
1 address for the host (esxi)
1 address for the NFS storage (exports file must match this address not the esxi host address)
1 address for the guest
1 address for the vmotion
Still any fix for the error message? I am getting the same thing.
Error performing operation: Sysinfo error on operation returned status : Address not available. Please see the VMkernel log for detailed error information
The same prob. here to
Please help someone….
Error performing operation: Sysinfo error on operation returned status : Address not available. Please see the VMkernel log for detailed error information
[…] 2003 machine to install the User Mapping provider on, as Server 2008 has deprecated it. Read http://miketrellosblog.arcadecab.com/2010/08/setting-up-an-nfs-share-to-receive-esxi-4-1-vm-backups/ […]
Mn and Preston,
Have you tried what Simon wrote about, about needing the extra IP address for the NFS connection?
[…] I had been successfully backing up to a NFS Datastore on my backup server running XP for the past year. Hardware issues began to crop up on the server […]
[…] Setup nas http://miketrellosblog.arcadecab.com/2010/08/setting-up-an-nfs-share-to-receive-esxi-4-1-vm-backups/ […]