I have been running Plex for a long time. Like a lot of things in my home lab, the Plex server has been upgraded and modified over the years, but the underlying operating system hasn’t received nearly as much attention. It has just worked.
My current Plex server is a virtual machine running Linux Mint 19.3 on one of my Dell PowerEdge R720s. Mint 19.3 was released in 2019, so calling it a little long in the tooth would probably be generous. This VM had been running on an ESXi server for a few years before I converted it and migrated it as-is to Proxmox.
Plex itself isn’t nearly that old. I’ve continued updating Plex Media Server every so often over the years, and before starting this project it was running version 1.43.3.10896. Underneath it, though, was still the same old Mint 19.3 installation.
It was time to rebuild it.
In This Article
- Why Rebuild Instead of Upgrade?
- Taking Inventory Before Touching Anything
- Creating and Configuring the New Proxmox Mint 22.3 VM
- Let’s Install Plex
- Preparing the Old Plex Server for Migration
- Pre-Staging the Plex Data
- The Final Cutover
- Becoming 192.168.0.221
- Testing the New Plex Server
- Migrating Tautulli and Its History
- The Final Reboot Test
- Was All of This Really Necessary?
Why Rebuild Instead of Upgrade?
I could probably attempt to drag the existing Mint installation through multiple generations of upgrades, but I don’t see much upside to doing that.
The VM has been running for years. Packages have been installed, configurations have changed, and there are undoubtedly things on it that no longer need to be there. And Plex itself has changed many times over that time period.
A clean VM gives me a chance to start with a current operating system while carrying over the parts of the old Plex installation that I actually want. We in IT know how much faster a clean installation is.
The first step, though, was figuring out exactly what I had.
Taking Inventory Before Touching Anything
Before building the replacement, I spent some time documenting the existing server.
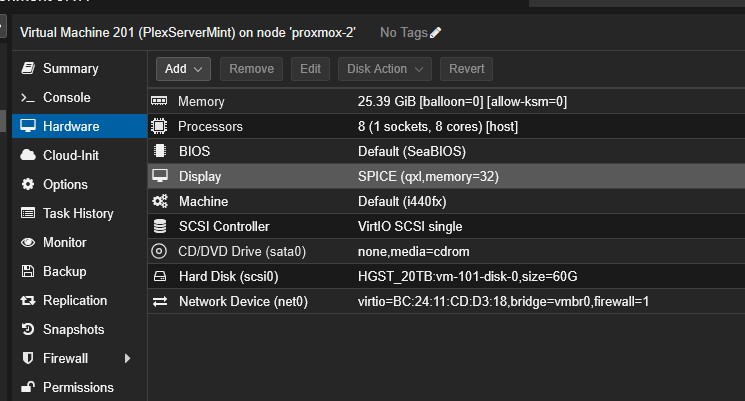
The VM is pretty generously configured, but it has run well, so I saw no reason to make major changes.
- 8 virtual CPUs
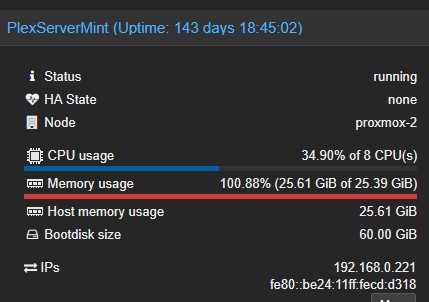
- About 25GB of RAM
- 60GB virtual disk
- Linux Mint 19.3
- Plex Media Server 1.43.3.10896
The VM had been running continuously for more than 143 days when I started documenting it. The uptime would have been much higher if not for an extended power outage 143 days ago.
The 60GB virtual disk has a 52GB root filesystem, with 31GB currently in use. I was curious how much of that was actually Plex, so I checked:
sudo du -sh /var/lib/plexmediaserver
14G     /var/lib/plexmediaserver
Fourteen gigabytes seemed like quite a bit, so I dug a little deeper.
sudo du -h --max-depth=1 "/var/lib/plexmediaserver/Library/Application Support/Plex Media Server"Most of it turned out to be exactly what you would expect from a Plex server that has been around for years:
7.6G    Metadata
2.7G    Plug-in Support
2.4G    Media
400M    Cache
93M     Scanners
78M     Logs
39M     Crash Reports
13M     Codecs
That was a good reminder that moving Plex isn’t simply a matter of installing Plex again and pointing it at my movies. There is quite a bit of accumulated Plex data that I want to bring along.
The movies and TV shows themselves aren’t stored in this VM. They live on my storage server and are mounted by the Plex VM as CIFS shares at /media/Media and /media/DVR. That part of the new server should be fairly easy to duplicate.
Transcoding to RAM
One configuration I definitely want to carry forward is the RAM disk I use for Plex transcoding. Since I had fiber installed three years ago, transcoding is less important than it used to be. Most of my remote users can Direct Play or Direct Stream their media now. I still see transcoding with some clients and media, though, particularly on mobile devices.
The current VM has a 16GB tmpfs mounted at /tmp/ramdisk:
RamDisk /tmp/ramdisk tmpfs defaults,size=16G,x-gvfs-show 0 0Plex is specifically configured to use /tmp/ramdisk as its transcoder temporary directory.
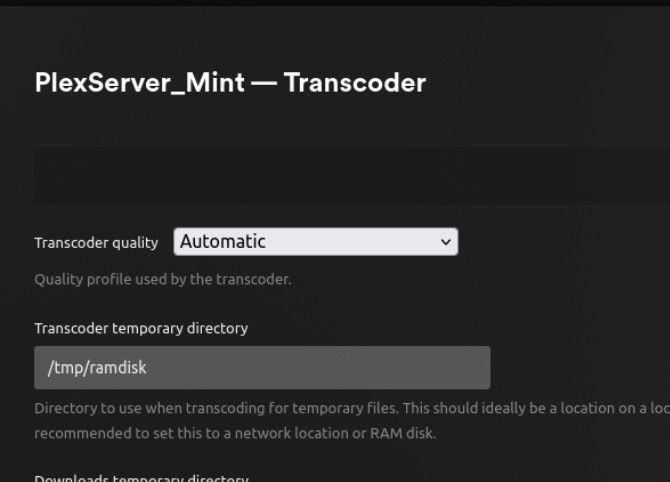
I have plenty of RAM available in the R720, so there isn’t much reason to generate a bunch of temporary transcoding files on disk when I can put them in memory instead.
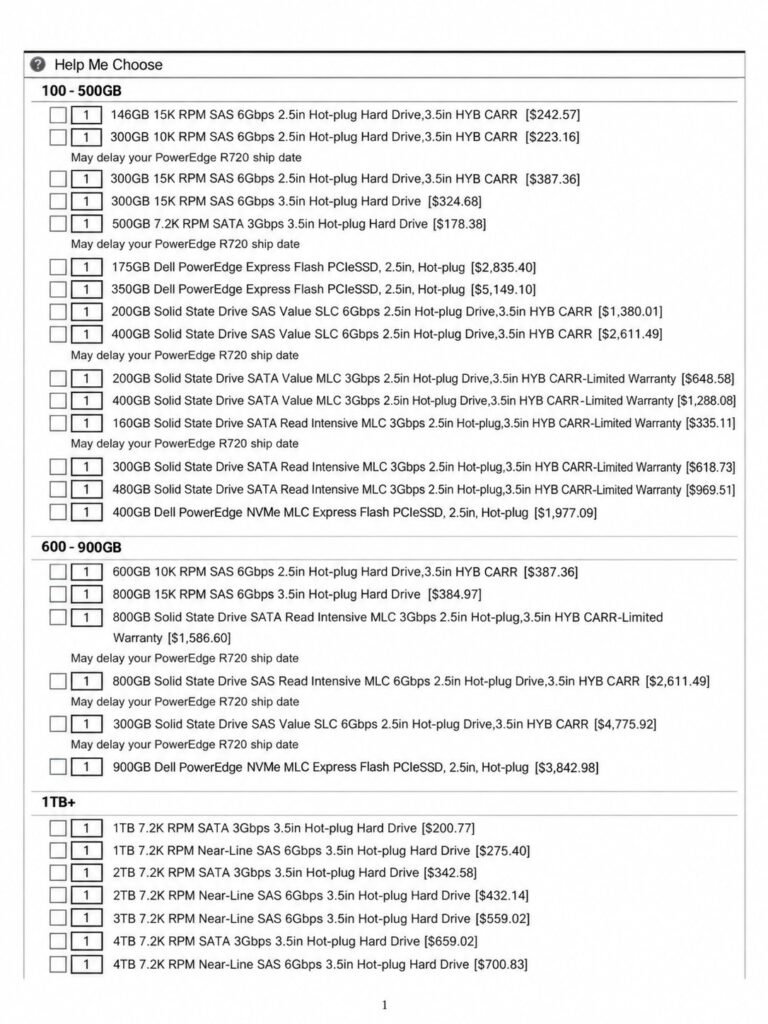
This isn’t actually the first time I’ve used RAM this way. Back around 2013 or 2014, I helped build our first VDI environment at work. Enterprise SSDs were very expensive back then. Very expensive. Providing enough SSD storage and mirroring it for redundancy added considerably to the cost. Below is a page of Dell drive prices I pulled from an email of mine from 2013. So I went in a different direction.
I used internal SD mirrors to boot ESXi, and two smaller spinning SAS disks for the server’s datastore drive that held a couple small Linux virtual machines. And I filled the rest of the server with RAM (384GB of it; 24x16GB sticks). I then used an Atlantis ILIO Diskless VDI virtual appliance that presented a large chunk of that memory to ESXi as an NFS datastore, and that was where the VDI desktops were generated. ILIO used inline deduplication and compression to reduce how much physical RAM the desktop images actually consumed. With that configuration in early 2014, each server was around $12,000, including tax and a five-year warranty.
And that’s actually where the two servers with 384GB of RAM came from that ended up in my homelab. More of that story in the Why I’m Still Running Dell PowerEdge R720s in 2026 article.
Years later, using 16GB of RAM for Plex transcoding is a much smaller version of the same idea. RAM is fast, I already have plenty of it, and the transcoding files are temporary anyway.
That configuration is definitely coming along to the new server.
Tautulli Is Part of the Server, Too
Plex isn’t the only application running on this VM. I also run Tautulli, which I’ve used for years to monitor what’s happening on Plex. If you have a Plex server, you owe it to yourself to download and install it. It just provides so much visibility into Plex that I’ve never really missed having that level of reporting in Plex itself.
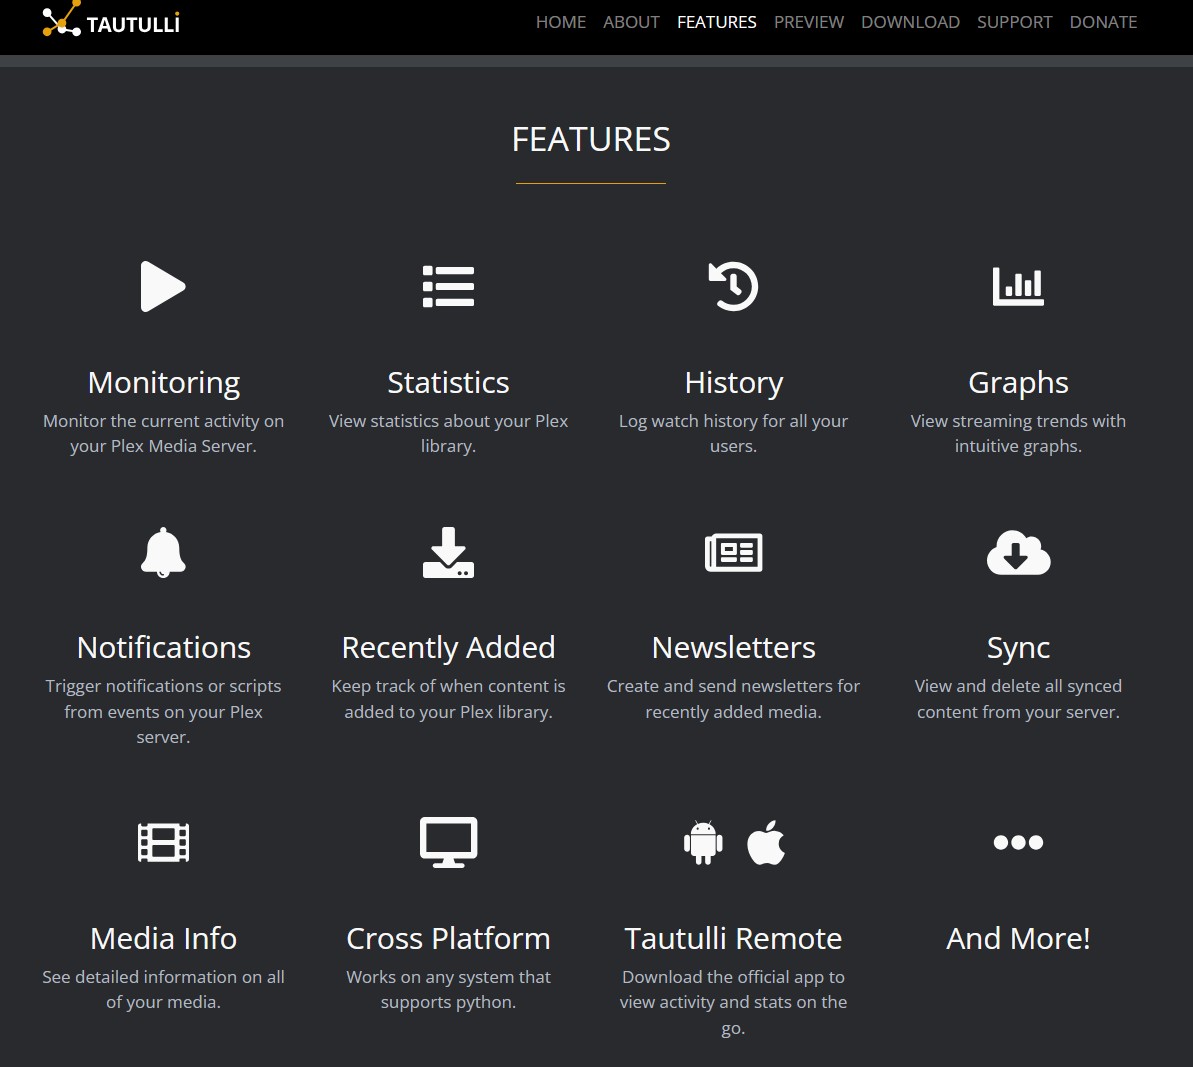
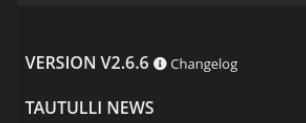
The existing installation turned out to be Tautulli 2.6.6, installed under /opt/Tautulli. Its directory has grown to about 1.3GB, and Tautulli runs under its own tautulli account.
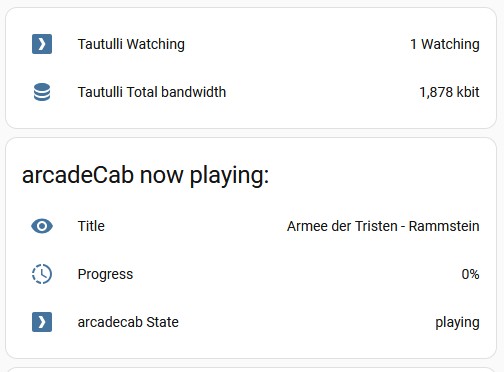
Tautulli listens on port 8181, and I don’t just use it directly. I also have Tautulli connected to Home Assistant. That lets me see who is running what on Plex at any given time from Home Assistant.
Because of that, I don’t want to simply install a fresh copy and lose years of history and configuration. The plan is to install a current version of Tautulli on the replacement server and migrate the information I want to keep.
Yes, My Plex Server Has a Desktop
Technically, Plex certainly doesn’t need a graphical desktop, but that’s not how I use this particular VM. I use Firefox directly on the Plex VM to administer Plex and Tautulli. When I add new TV shows or movies, I connect to this VM, open Plex in Firefox and rescan the appropriate library. Super simple for me, and it makes the whole thing more self-contained. If I need to do any Plex maintenance, I just go to the PMS console screen in Proxmox.
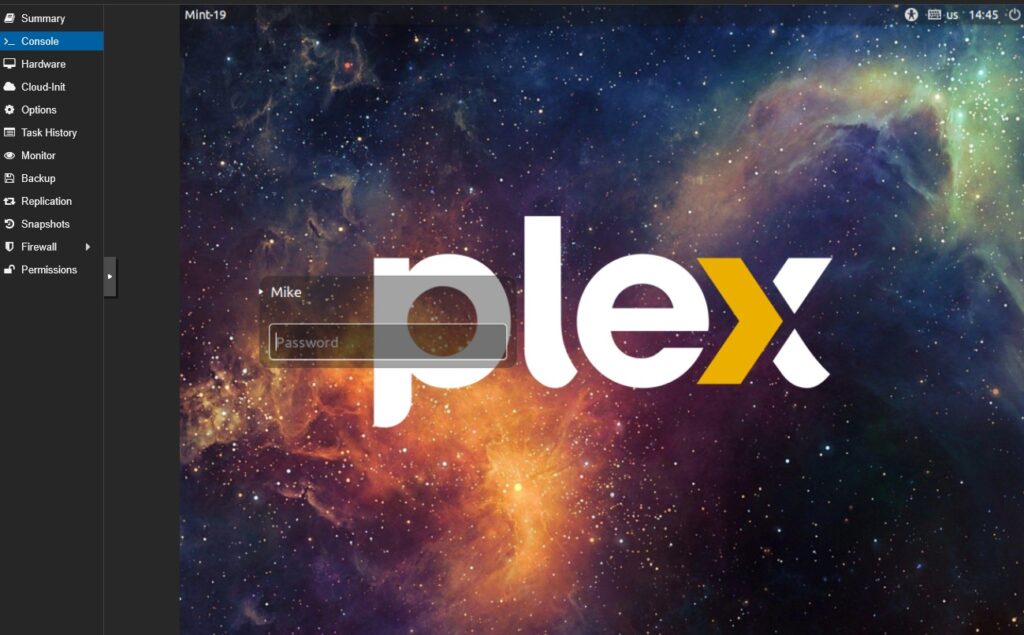
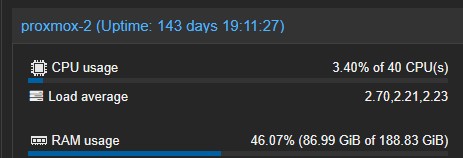
I’m also not particularly worried about the additional resources required by a desktop environment. The R720 hosting this VM has 40 logical CPUs and 192GB of RAM. While I was working on this project, the entire Proxmox host was sitting at around 3.4% CPU utilization and 46% RAM usage.
The Plex VM itself wasn’t exactly struggling either:
              total       used       free      shared  buff/cache   available
Mem:            24G       4.0G       6.9G         56M         13G         20G
I didn’t see much reason to give up the desktop just to save a bit of resources on this server.
Ubuntu or Mint?
One question I considered while planning the replacement was whether I should move away from Linux Mint and use something like Ubuntu Server. I did briefly consider moving the replacement to Ubuntu LTS, but there wasn’t really a compelling reason to do it. I already use Linux Mint for several other VMs and I’m comfortable with it. It has been my go-to when I need a single purpose Linux machine. Familiarity is a huge plus. Mint uses Ubuntu’s LTS base, and the old Mint Plex server has certainly proven that the combination works for me.
Changing distributions just for the sake of changing distributions didn’t make much sense, so I’m sticking with Mint.
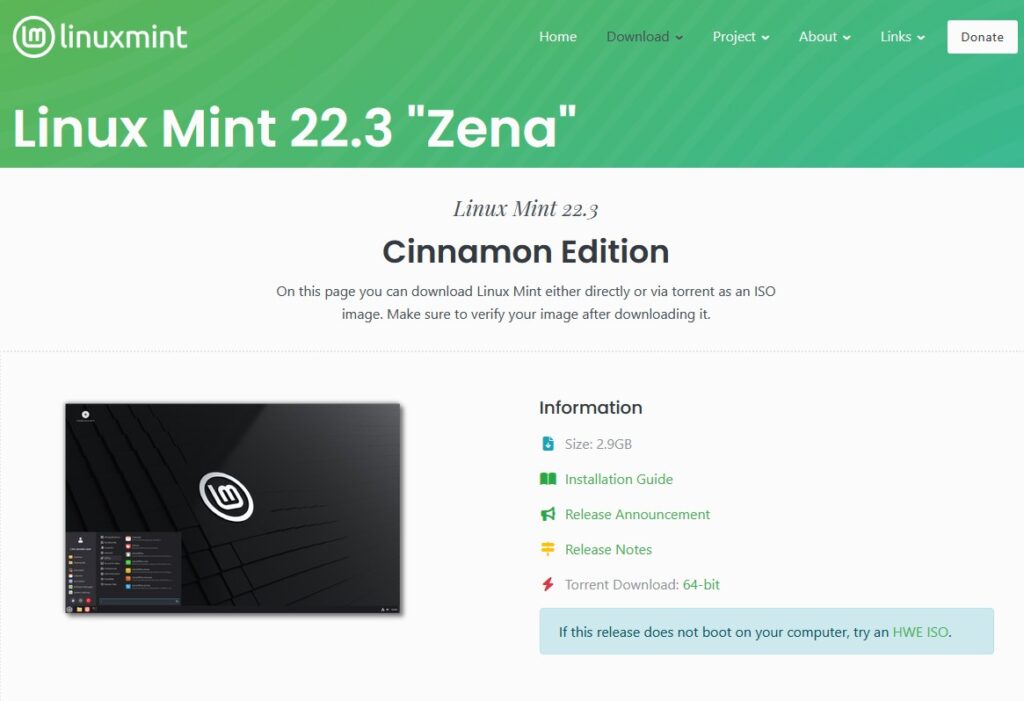
The replacement server will run Linux Mint 22.3 Cinnamon. Because it is built on Ubuntu 24.04 LTS, it will be supported until April 2029. The Mint versions I have historically used were also built on Ubuntu LTS releases.
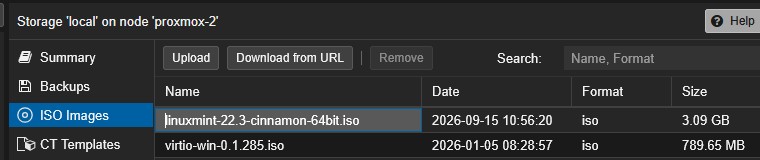
I downloaded the ISO and uploaded it to my Proxmox ISO storage.
Keeping the Same IP Address
The existing Plex server uses 192.168.0.221, and I want the replacement server to eventually take over that address.
There is a practical reason for that.
Plex Remote Access is already working exactly the way I want it. Plex listens internally on its normal TCP port 32400. I manually expose a port externally and forward that to the Plex server.
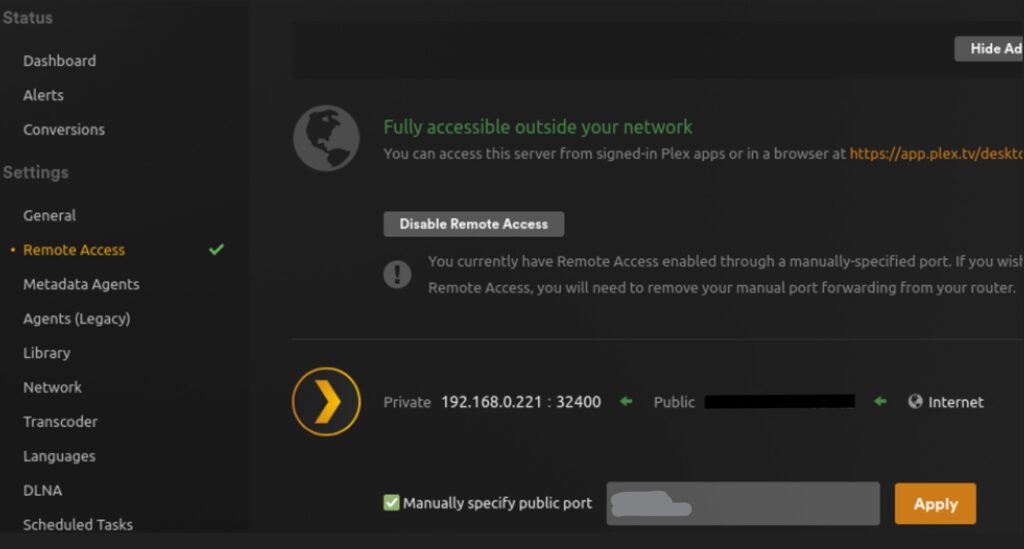
Rather than change the existing network configuration and anything else that might refer to the old server’s address, I’ll initially build the replacement Plex server using a temporary IP address. Whatever DHCP hands out. That allows the old and new machines to run side-by-side while I’m building and testing.
Once I’m confident that everything is working, I’ll shut down the Mint 19.3 VM and assign 192.168.0.221 to the new one. The existing port forwarding should then continue working without needing to be changed.
At least that’s the plan.
One More Backup
I’m paranoid about backups, so before I started building anything I made one more full Proxmox backup of the old Plex VM. And I will likely make one more before I eventually shut down the old VM. Because reasons.
The 60GB virtual disk produced a 21.76GB compressed backup. The entire backup completed in 6 minutes and 53 seconds. That gives me another recovery point in addition to leaving the original VM intact.
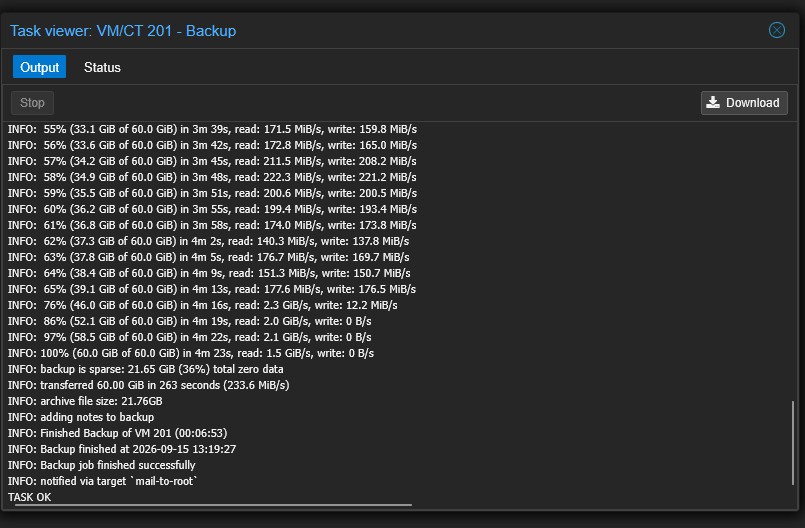
And that’s where I’m starting.
The old Mint 19.3 Plex server is still running and serving media exactly as it was before. I have a fresh full backup of it. The Mint 22.3 ISO is sitting on my Proxmox server. Now I get to build its replacement.
Creating and configuring the new Proxmox Mint 22.3 VM
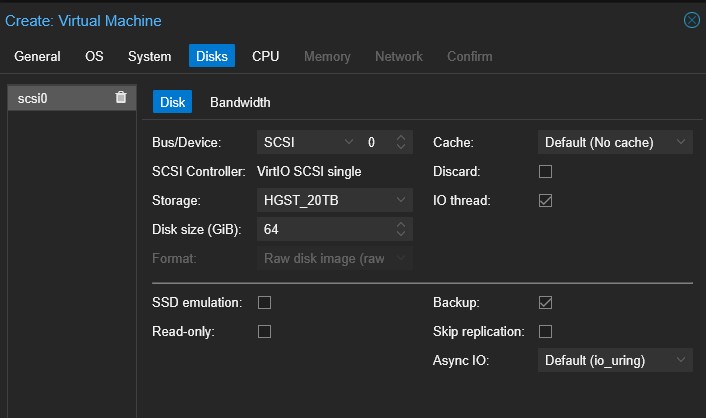
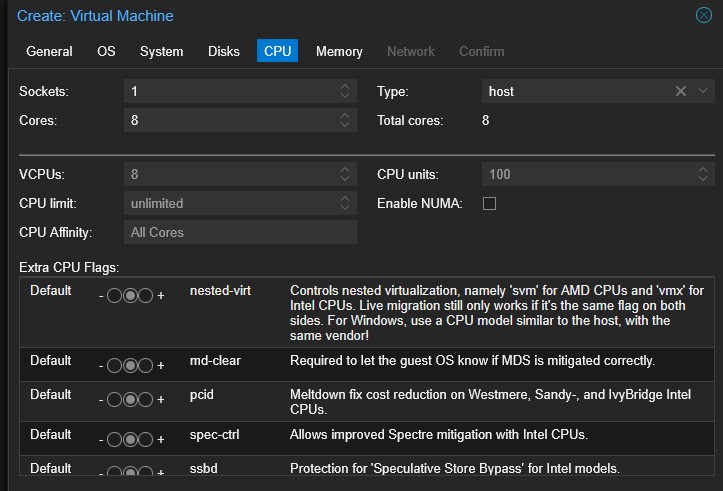
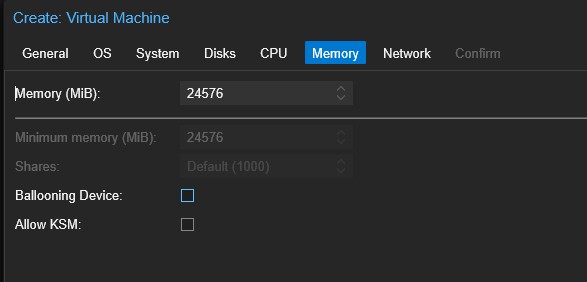
The first thing I did was create a new VM on the PVE host. I followed, more or less, the settings from the 19.3 VM. My specific settings are shown in the series of screenshots below.
I didn’t duplicate the old VM exactly. Since I was starting fresh, I took the opportunity to modernize some of the virtual hardware. The old VM used SeaBIOS and the older i440fx machine type (leftover from the ESXi to Proxmox migration); the new one uses OVMF/UEFI and q35. I kept the resources fairly similar, with eight virtual CPUs, 24GB of RAM and a 64GB virtual disk. The R720 has plenty of resources available, so there wasn’t much reason to reduce them.
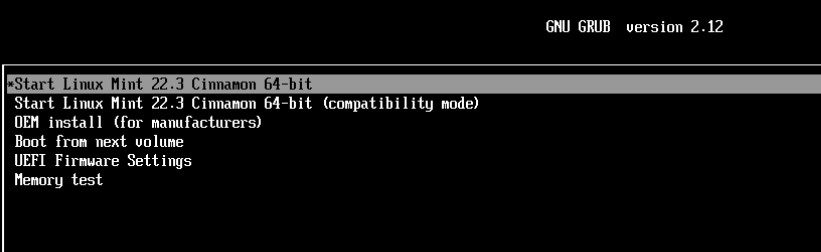
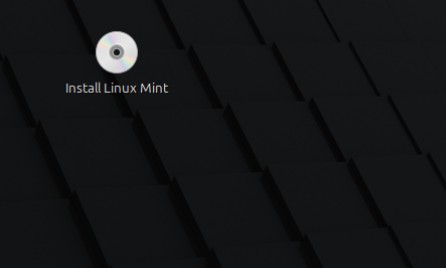
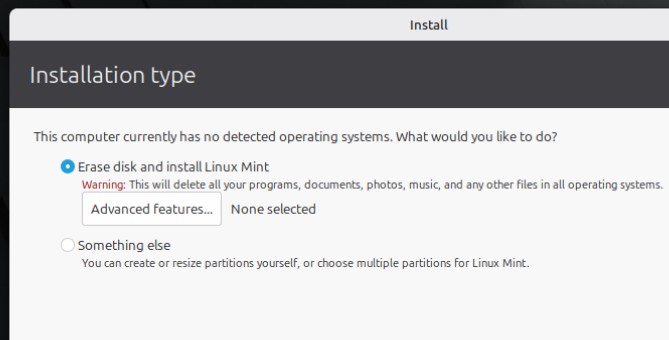
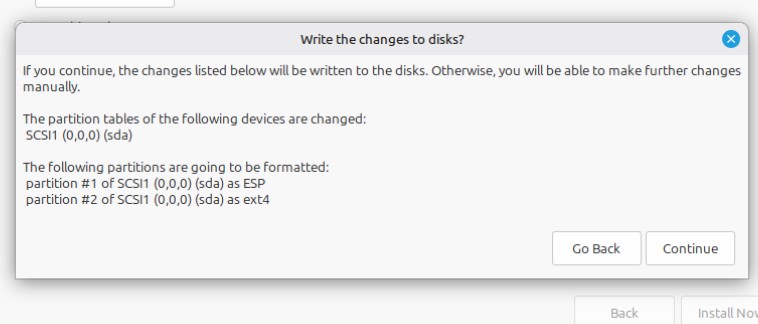
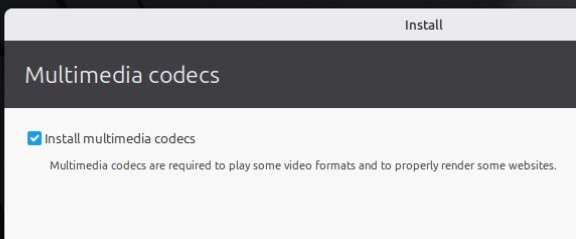
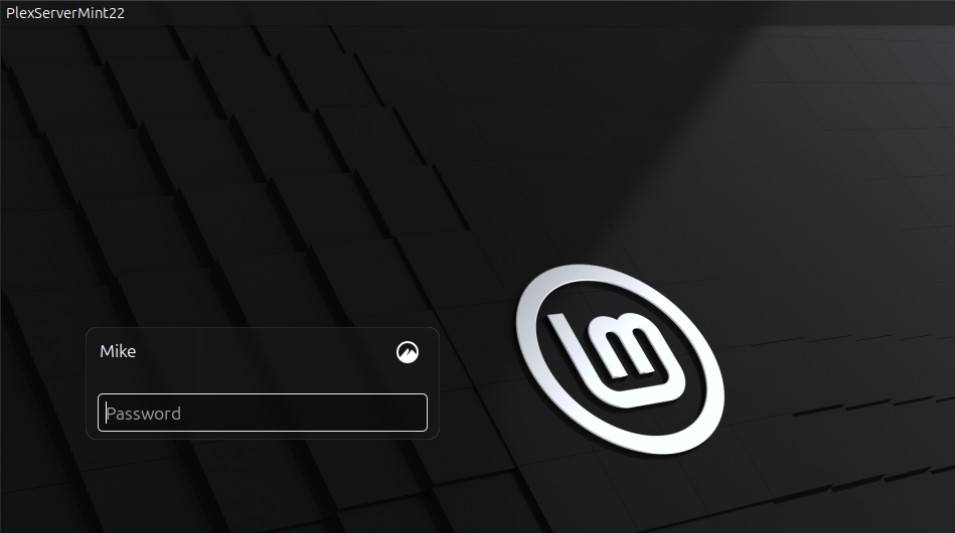
I created the VM without starting it first. The ISO was already uploaded to the ISO folder on the PVE host. I attached that to the virtual CD drive in the newly created VM and booted. Once the machine came up, I just did a normal install of Mint; nothing special.
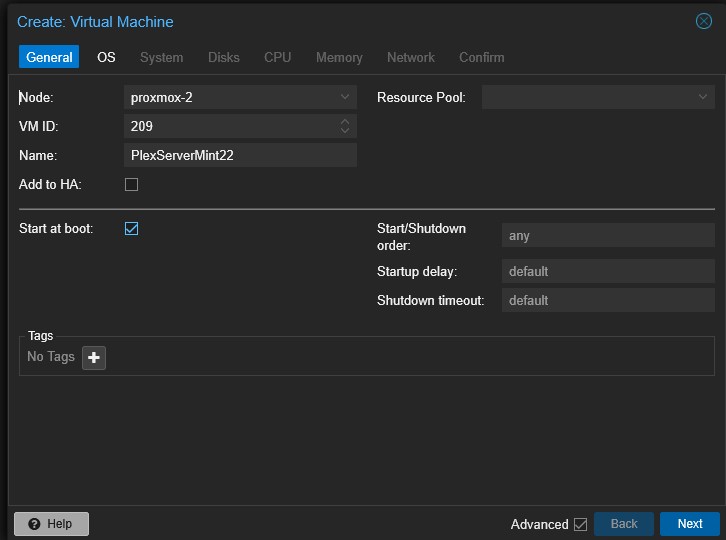
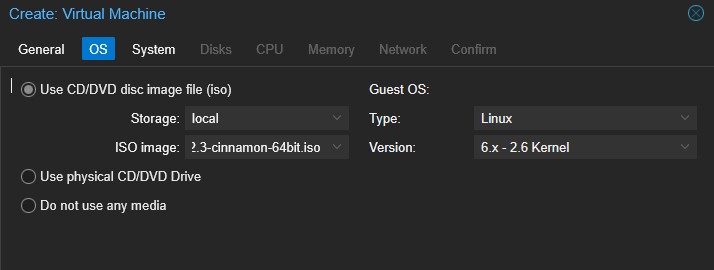
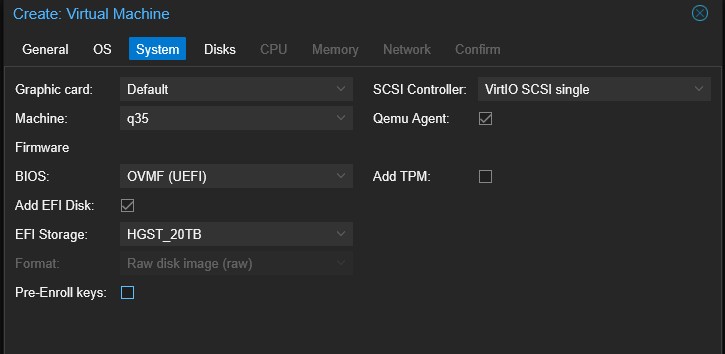
Post-install configuration
With Mint 22.3 installed, I had a few things to configure before I wanted to install Plex or start moving anything from the old server.
The first order of business was simply getting Mint completely up to date. The installation ISO booted with a 6.14 kernel, but after installing all available updates the machine came back running the newer 7.0.0-31 kernel.
I also installed the QEMU Guest Agent with sudo apt install qemu-guest-agent. This gives Proxmox better communication with the guest operating system and is something I normally install on my Linux VMs. After a reboot I verified that the agent was running correctly: systemctl status qemu-guest-agent --no-pager

Making configuration a little easier
I normally use the Mint desktop and Firefox when I am working directly with Plex or Tautulli, but entering Linux commands through the Proxmox console gets old very quickly. Copy and paste between my desktop and the Proxmox console isn’t fun at all for the typing impaired. Despite working my entire career on keyboards, I have never given in to touch typing.
I installed OpenSSH Server on the new VM with sudo apt install openssh-server and, for now, the machine received the IP address 192.168.0.103. That let me SSH into it from my Windows desktop via PowerShell and made the rest of the configuration considerably easier by allowing me to copy and paste commands.
The .103 address is temporary. The old Plex server is still alive at this point, and I don’t intend to give the new server its final network configuration until I am ready to actually cut over.
Mint also recommends enabling its System Snapshots feature. I left that disabled on this machine. Since Plex is running inside a Proxmox VM, I already protect the entire VM with Proxmox/PBS backups and take additional backups before major migration steps. Adding another set of snapshots inside the guest didn’t provide much additional value for me.
Recreating the storage mounts
My media isn’t stored inside the Plex VM. It lives on my OMV storage server and the Plex VM accesses it through two network shares mounted as:
/media/Media/media/DVR
I deliberately recreated the same paths on the new server. Since I plan to migrate the existing Plex database and configuration rather than build all of my libraries again, keeping the paths identical should make that migration considerably cleaner. I created the two mount points:
sudo mkdir -p /media/Media
sudo mkdir -p /media/DVR
I did make one small improvement while recreating the mounts. On the old Mint 19.3 server, the username and password for the SMB shares were included directly in /etc/fstab. They are now stored in a separate root-only credentials file with 600 permissions, and fstab references that file instead. The commands to do that were:
sudo nano /root/.plex-smb-credentials
sudo chmod 600 /root/.plex-smb-credentials
sudo ls -l /root/.plex-smb-credentials
The relevant entries in my new /etc/fstab now look like this:
RamDisk /tmp/ramdisk tmpfs defaults,size=16G,x-gvfs-show 0 0

//192.168.0.242/Media /media/Media cifs credentials=/root/.plex-smb-credentials,file_mode=0777,dir_mode=0777,uid=1000,gid=1000,nofail 0 0

//192.168.0.242/DVR /media/DVR cifs credentials=/root/.plex-smb-credentials,file_mode=0777,dir_mode=0777,uid=1000,gid=1000,nofail 0 0
I also retained the nofail option I used on the old server. If the OMV machine happens to be unavailable while Plex is booting, I don’t want a missing media share preventing the Linux VM itself from starting.
Recreating my Plex RAM disk
There was one other important line in the old server’s fstab that I definitely didn’t want to forget:
RamDisk /tmp/ramdisk tmpfs defaults,size=16G,x-gvfs-show 0 0
That creates a 16GB RAM disk at /tmp/ramdisk. On the old server, Plex is configured to use that as its temporary transcoding directory.
As I noted earlier, this wasn’t something Mint or Plex created automatically. I specifically configured Plex this way so its temporary transcoding files would stay in RAM instead of generating unnecessary I/O against the VM’s virtual disk.
I created the mount point as shown:
sudo mkdir -p /tmp/ramdiskAfter recreating the RAM disk and both network mounts, I rebooted the new VM to make sure everything came back on its own.

All three did. The 16GB RAM disk was back, along with both OMV shares.
A backup before Plex
At this point I had a clean Mint 22.3 VM, current updates, working Proxmox guest integration, SSH access, my media shares mounted at their original locations, and the transcoding RAM disk recreated.
This seemed like a particularly good place to stop and take a backup.
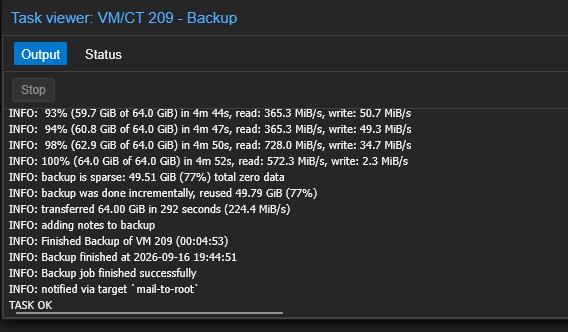
I added the new Plex VM to a new Proxmox backup job and ran a full backup. If I make a mess of the Plex migration from here, I now have a clean recovery point rather than having to repeat everything I’ve done so far. I will likely take a few more backups before key steps.
With that done, the basic server is ready. Now I can actually install Plex.
Let’s Install Plex
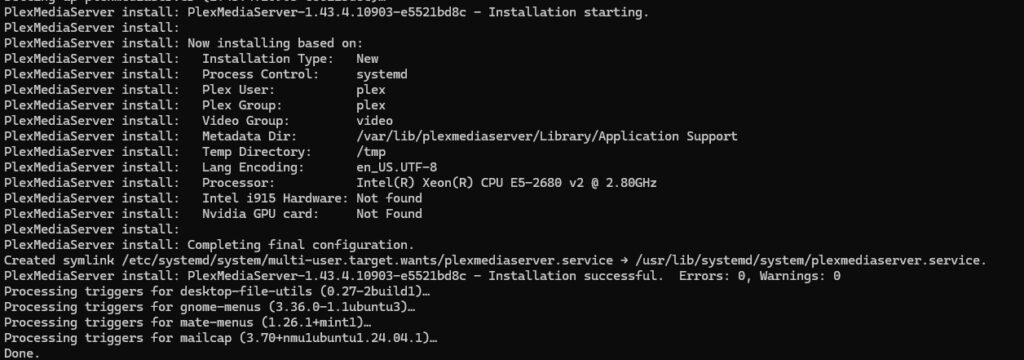
For DEB-based systems, Plex says the easiest supported method is their repository setup script, which configures the current Plex repository and installs the latest public Plex Media Server release.
curl -LsSf https://repo.plex.tv/scripts/setupRepo.sh | sudo bashThe installation completed without any errors or warnings and installed Plex Media Server 1.43.4.10903. The installer also created the plex user and group and put the Plex application data in the normal Linux location under /var/lib/plexmediaserver.
I did not open the Plex web interface or begin configuring the new server. This is going to be a migration of my existing Plex installation, not a new Plex server. I want to bring over the existing database, metadata, configuration and server identity rather than create new libraries and start over.
There was one detail I wanted to clean up before going any further. My old Plex server was running version 1.43.3.10896, while the new installation was now running 1.43.4.10903. Plex migrations don’t necessarily require the versions to be identical, but since I was only one release behind, I decided to update the old server first. That removes one more variable from the migration.
Interestingly, the old server was still configured with Plex’s older Linux repository. I ran the same repository setup script on it:
curl -LsSf https://repo.plex.tv/scripts/setupRepo.sh | sudo bashThe script detected the old repository configuration, removed it, configured Plex’s current repository and upgraded the existing installation. The installer correctly recognized this machine as an Update rather than a new installation.
Afterward, the old server was also running Plex Media Server 1.43.4.10903. I opened Plex and verified that the server was still claimed to my account, still had its original PlexServer_Mint friendly name, and was operating normally.
Now both the source and destination servers were running exactly the same Plex version.
Before doing anything with the Plex data itself, I stopped Plex Media Server on the new Mint 22.3 server:
sudo systemctl stop plexmediaserverI checked the service afterward:
systemctl is-active plexmediaserverInstead of the expected inactive, it returned failed. Looking a little deeper with:
systemctl status plexmediaserver --no-pagershowed that Plex hadn’t responded to systemd’s normal SIGTERM quickly enough. After the stop operation timed out, systemd killed the process with SIGKILL. Since this was a brand-new Plex installation with none of my old data on it yet, there wasn’t anything here I was concerned about losing.
Still, I wanted to make absolutely certain that Plex was no longer running before I started moving data:
pgrep -a -f PlexThe only result was avahi-daemon, because the command line happened to contain the new machine’s hostname, PlexServerMint22.local. There were no Plex Media Server processes left running.
At this point the new Plex installation was installed, completely stopped, and ready to receive the old server’s data.
Preparing the old Plex server for migration
Before copying anything, I disabled “Empty trash automatically after every scan” in the Plex library settings. During a migration, the last thing I want Plex doing is deciding that temporarily unavailable media should be removed from the library.
I disabled that option under Settings → Library on the old server.
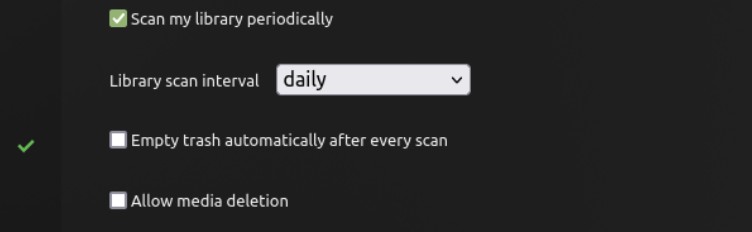
The new Plex server remained stopped throughout all of this. The old Plex server was still my production server and continued running normally.
Figuring out how much Plex data I actually had
My Plex data directory was:
/var/lib/plexmediaserverIt contained about 14GB of data. More interestingly, there were 83,062 individual files in the Plex Media Server directory.
find "/var/lib/plexmediaserver/Library/Application Support/Plex Media Server" -type f | wc -lThat large file count helped convince me that I didn’t want to wait until the final cutover to copy everything. I was also going to be away from home Friday night and Saturday and expected to use Plex remotely, so taking the old server down early wasn’t an option.
My plan became to make an initial copy of the Plex data while the old server was still running, then do a final synchronization after stopping Plex when I was actually ready for the cutover.
The first copy would only be a pre-stage. I would not consider a database copied while Plex was running to be a valid final migration copy.
One small permissions complication
Before copying anything, I checked the Plex account on each server with id plex.
On the old Mint 19.3 server: uid=122(plex) gid=129(plex)
On the new Mint 22.3 server: uid=997(plex) gid=986(plex)
So blindly preserving the old numeric user and group IDs would be a bad idea. The migrated files will ultimately need to belong to the plex account on the new server, regardless of what numeric UID and GID Plex happened to receive on the old installation.
I found another complication when I checked whether my normal mike account could read the Plex data. Of the 83,062 files, it could only read 81,181. A look at some of the remaining files explained why: "-rw------- plex plex"
There were 1,881 files that only the Plex user (or root) could read. They included Plex certificates, metadata, posters and XML files.

That ruled out simply using my normal account to rsync the Plex directory. I wanted the migration to include everything.
Setting up a safe direct transfer
I installed OpenSSH Server (sudo apt install openssh-server) on the old Mint 19.3 machine since it hadn’t previously been running an SSH server. I did not install the hundreds of other available Mint/Ubuntu updates. This machine was about to be retired, and doing a large OS update immediately before migrating Plex seemed like a great way to create a completely unnecessary problem.
With SSH working, the new VM could communicate directly with the old one.
I checked both machines with rsync --version. The old server had rsync 3.1.2 and the new one had 3.2.7. Both supported protocol version 31.
To give rsync access to all of the Plex files without changing any of their permissions on the old server, I created a temporary ED25519 SSH key on the new VM:
ssh-keygen -t ed25519 -f ~/.ssh/plex-migration -C "temporary Plex migration"I authorized that key for root on the old server. Root password login remained disabled; the temporary key was the only thing being used for this migration.
A simple test from the new server:
ssh -i ~/.ssh/plex-migration root@192.168.0.221 'whoami'returned:
rootThat gave the new server read access to all of the old Plex files without modifying their ownership or permissions.
The temporary key pair on the new server will be removed after the migration is complete.
Backups before touching anything
At this point I stopped and made fresh Proxmox backups of both VMs.
The old Plex VM backup gave me a current recovery point for the working server. I also backed up the new VM before putting any migrated Plex data on it.
I had backups from earlier in the process, but storage is cheap and regret is expensive.
Pre-staging the Plex data
Rather than copying the live data directly into the new Plex installation, I created a completely separate staging directory on the new server:
sudo mkdir -p /var/lib/plex-migration-stageThe actual Plex installation on the new server remained untouched and Plex remained stopped.
Before copying anything, I did an rsync dry run. I do this often with my jobs to make sure what I think is going to happen actually happens.
sudo rsync -aH --dry-run --stats \
  -e "ssh -i /home/mike/.ssh/plex-migration" \
  root@192.168.0.221:"/var/lib/plexmediaserver/" \
  /var/lib/plex-migration-stage/
The dry run found:
Number of files: 177,410
Number of regular files: 83,062
Number of directories: 94,216
Number of links: 132
Total file size: 13,435,805,421 bytes
Number of deleted files: 0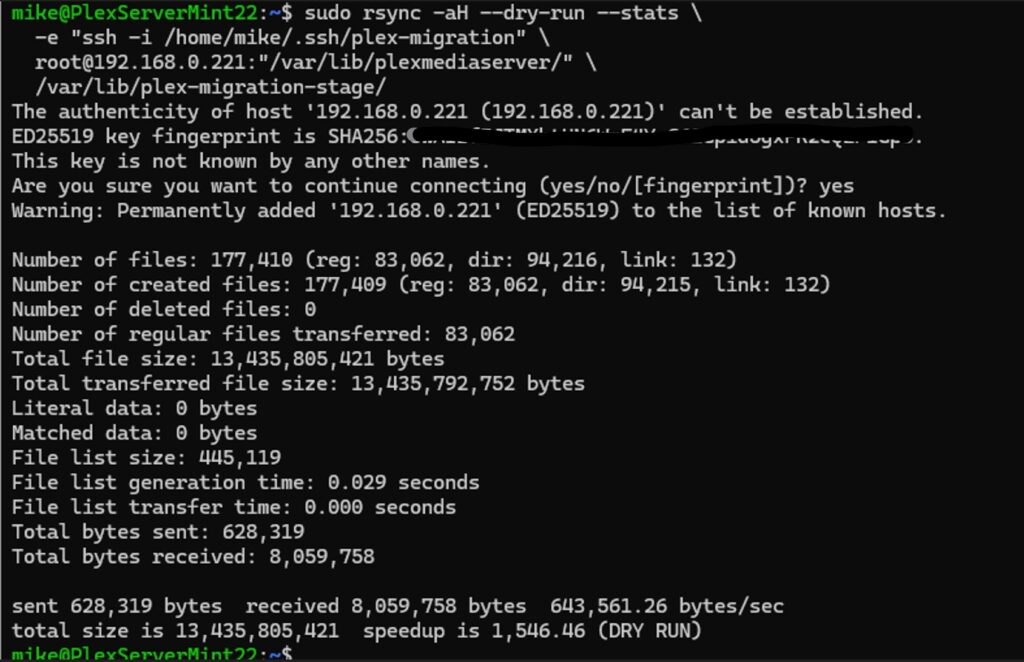
Most importantly, the 83,062 regular files matched the count I had obtained directly on the old server. I knew rsync could see everything before allowing it to actually copy anything. Whew!
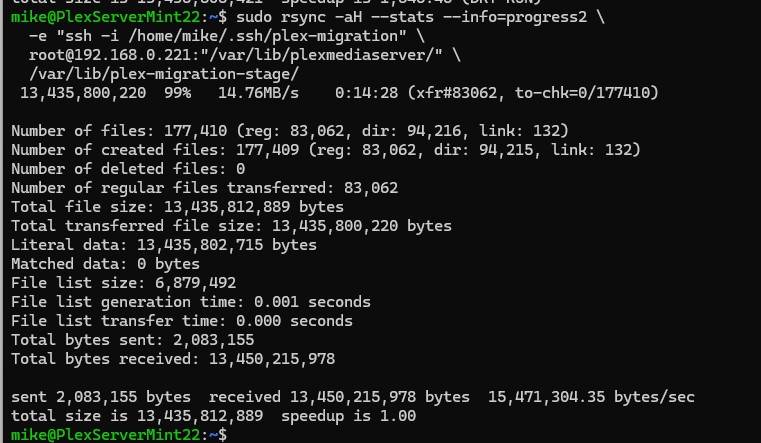
I then ran the real pre-stage:
sudo rsync -aH --stats --info=progress2 \
  -e "ssh -i /home/mike/.ssh/plex-migration" \
  root@192.168.0.221:"/var/lib/plexmediaserver/" \
  /var/lib/plex-migration-stage/
The copy took roughly 14½ minutes and averaged about 15.5MB/sec, in case anyone cares. When it finished:
Number of files: 177,410
Number of regular files transferred: 83,062
Number of deleted files: 0
Total file size: 13,435,812,889 bytes
I counted the files in the staging directory with find /var/lib/plex-migration-stage -type f | wc -l. It returned exactly 83,062.
Interestingly, the Plex data had grown by several kilobytes between the dry run and the actual copy. That wasn’t surprising—the old Plex server was still running and actively modifying its database. I was listening to music from Plex while doing all this. Rammstein seemed to be the best pairing.
Looking at the copied database directory made that even more obvious. In addition to the main Plex library database, there were active SQLite WAL and SHM files. The main library database was about 232MB and its WAL file had grown to roughly 248MB.
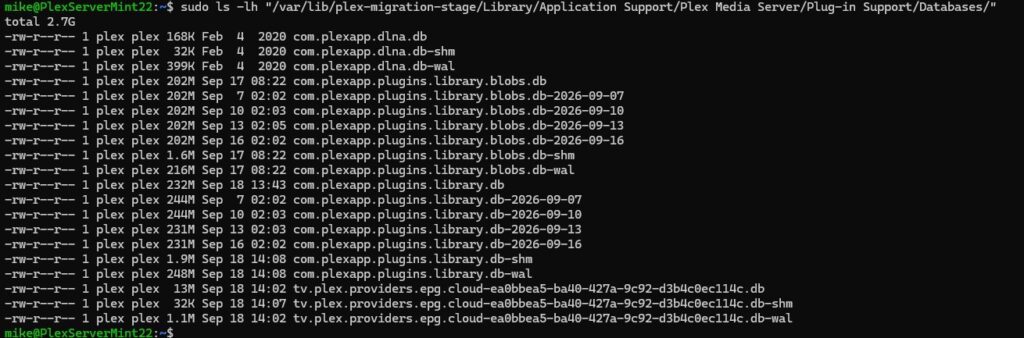
That is exactly why I consider this only a pre-stage. I am not going to start the new Plex server using this copy.
And that’s where I stopped
At this point I had accomplished what I wanted without taking the old Plex server offline.
The old Mint 19.3 Plex server at .221 was still running normally, and it could continue to be used while I was away from home. The new Mint 22.3 server remained stopped, with the copied data safely isolated in /var/lib/plex-migration-stage.
When I’m ready for the actual cutover, the plan is to:
- Stop Plex on the old server and verify that it really is stopped.
- Run rsync again so the staging directory receives everything that changed since the initial copy.
- Treat that stopped-server synchronization as the authoritative migration copy.
- Move the migrated data into the new Plex installation.
- Change ownership to the new server’s
plex:plexaccount rather than preserving the old numeric UID/GID. - Start Plex on the new server and begin testing.
- Eventually move the new server to the old
.221address once I’m satisfied everything is working.
For now, though, the old server still worked, and I was going to leave it that way until I was home for the final cutover.
The Final Cutover
At this point, I had copied almost all of the Plex data to the new server, but the old Plex server was still running and was still the production server. That meant the copy on the new server was already out of date.
That was intentional.
I wanted the old server available for as long as possible, so I had done the big 13+GB transfer ahead of time while Plex was still running. Now I only needed to stop Plex long enough to synchronize everything that had changed since that first copy.
Before doing anything else, I made fresh backups of both VMs. Because, well, backups.
I stopped Plex on the old Mint 19.3 VM and verified that there were no Plex Media Server processes left running.
sudo systemctl stop plexmediaserver
pgrep -a -f 'Plex Media Server'
At that point, the outage had officially started.
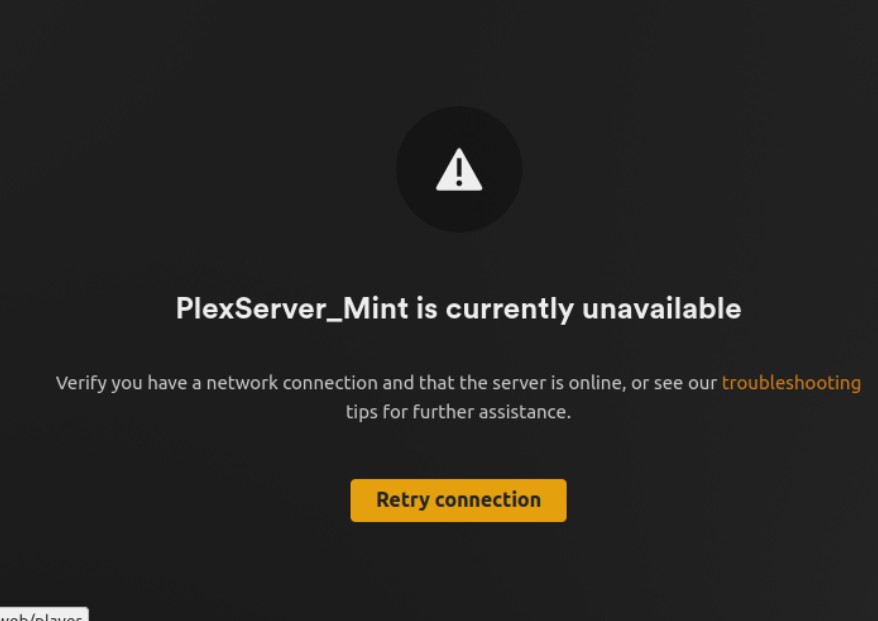
And Plex agreed. Trying to reach the server now gave me the expected message that PlexServer_Mint was unavailable.
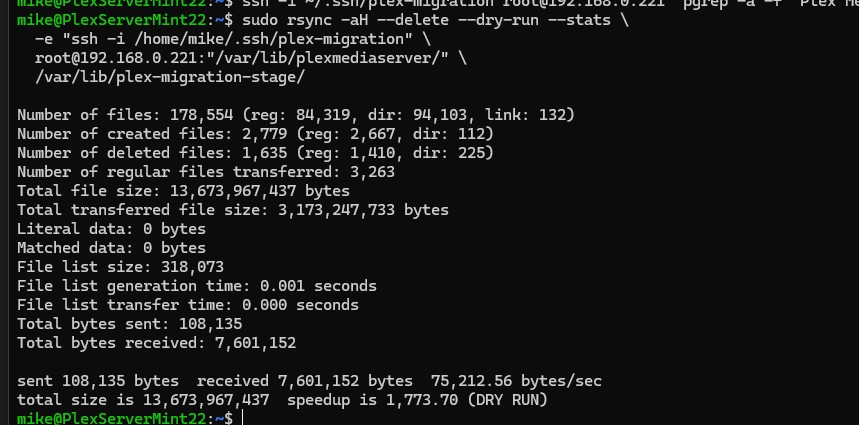
I then ran another rsync as a dry run, this time using --delete.
sudo rsync -aH --delete --dry-run --stats \
  -e "ssh -i /home/mike/.ssh/plex-migration" \
  root@192.168.0.221:"/var/lib/plexmediaserver/" \
  /var/lib/plex-migration-stage/
That was important. During the time between my original copy and the final cutover, Plex hadn’t just created and modified files. It had also removed some. The final copy needed to make the staging directory actually match the old Plex server rather than simply adding newer files to it.
The dry run found quite a bit more activity than I expected:
- 2,779 files and directories had been created.
- 1,635 had been deleted.
- 3,263 regular files needed to be transferred.
- About 3.17GB of data needed to be synchronized.
That was a pretty good demonstration of why I didn’t simply copy the Plex directory one evening and call it done. Plex’s data is constantly changing even when I’m not actively doing anything with it.
With the dry run looking reasonable, I ran the real final rsync. This time about 2.8GB actually had to cross the network, and the transfer ran at just under 30MB/sec.
sudo rsync -aH --delete --stats --info=progress2 \
  -e "ssh -i /home/mike/.ssh/plex-migration" \
  root@192.168.0.221:"/var/lib/plexmediaserver/" \
  /var/lib/plex-migration-stage/
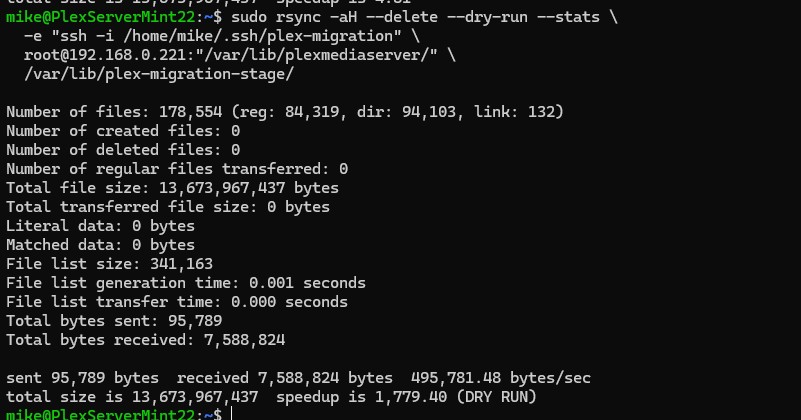
More importantly, when it finished I immediately ran the same dry run again.
Nothing.
Zero files created. Zero deleted. Zero files transferred.
The staging copy and the now-stopped old Plex server finally matched.
Making the Copy Live
I still wasn’t quite ready to start Plex.
The new Mint installation already had a fresh Plex installation on it, and I didn’t want to simply destroy that directory. There wasn’t any reason I should need it again, but there also wasn’t any reason to throw away a perfectly good fallback yet. I like having safety nets.
So I renamed the fresh Plex directory:
sudo mv /var/lib/plexmediaserver /var/lib/plexmediaserver-freshThen I moved my staging copy into its final location:
sudo mv /var/lib/plex-migration-stage /var/lib/plexmediaserverThere was one more important difference between the two servers.
On the old Mint installation, the plex account had UID 122 and GID 129. On the new installation it was UID 997 and GID 986.
The names were the same. The numeric IDs weren’t.
Since Linux really cares about those numbers, I changed ownership of the migrated directory to the plex account on the new server:
sudo chown -R plex:plex /var/lib/plexmediaserverNow it was time to find out whether all of this had actually worked. I started Plex, and it came up. Not as a new Plex server with empty libraries. It came up as PlexServer_Mint, with my existing libraries and configuration.
That was the first point where I started feeling pretty good about this.
Time to Actually Play Something
Seeing the libraries was nice, but that didn’t prove much by itself. I wanted to know whether Plex could actually get to my media and do something with it.
I started with some FLAC music. It Direct Played normally.
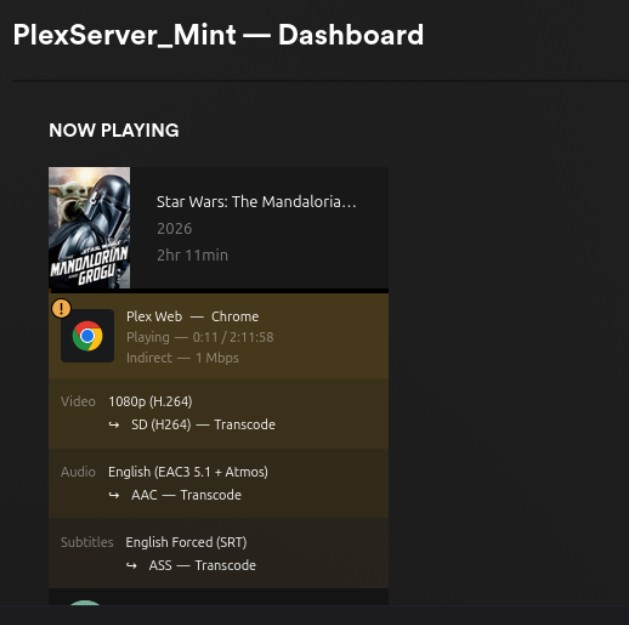
Then I deliberately made Plex work harder. I played an episode of The Mandalorian and forced it down to SD quality. Plex transcoded the 1080p H.264 video, converted the EAC3 audio to AAC, and handled the forced subtitles.
More importantly for this particular build, I checked the RAM disk.
/tmp/ramdisk/Transcode was there and owned by plex.
So the transcoder setting that had been carried over from the old server was actually using the 16GB tmpfs I had created on the new one.
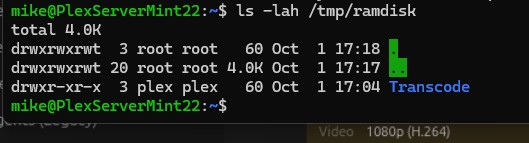
Plex was working. There was still one fairly major problem, though.
It wasn’t actually the “Plex Server” yet.
The old server still owned the address everything in my house expected Plex to be using.
Becoming 192.168.0.221
The old Plex VM had always been 192.168.0.221.
During all of this work, the new Mint 22.3 VM had been using a temporary DHCP address of 192.168.0.103. That let me build and test it alongside the production server without changing anything that was already using Plex. Now it was time for the new machine to take over.
I completely shut down the old Mint 19.3 VM, and then verified that 192.168.0.221 no longer answered a ping.
On the new VM I changed the NetworkManager connection from DHCP to a static address:
sudo nmcli connection modify "Wired connection 1" \
  ipv4.method manual \
  ipv4.addresses 192.168.0.221/24 \
  ipv4.gateway 192.168.0.1 \
  ipv4.dns 192.168.0.1
Then I brought the connection back up with sudo nmcli connection up "Wired connection 1". From another computer I pinged 192.168.0.221. Four replies, all less than a millisecond.
The new Plex server was now living at the old Plex server’s address.
The next SSH connection gave me a scary-looking warning about the host identification having changed.
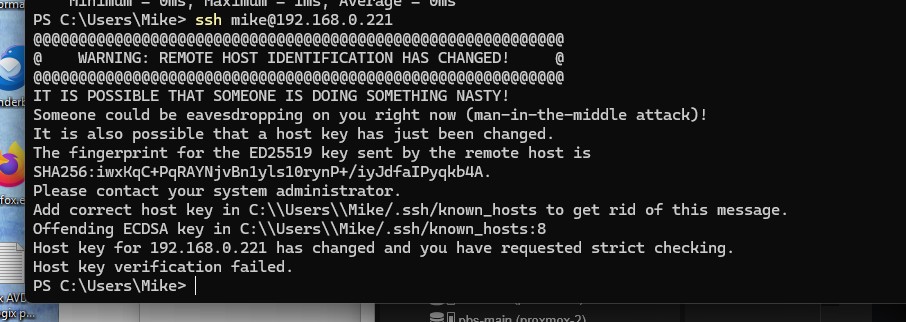
For once, that was exactly what I wanted to see as the computer at .221 really had changed.
I removed the old SSH host key from my Windows machine: ssh-keygen -R 192.168.0.221. I connected again, accepted the key from the new server, and hostnamectl confirmed that .221 was now PlexServerMint22 running Linux Mint 22.3.
This was also why I had gone to the trouble of giving the new machine the old address instead of just leaving it at .103.
I wanted everything else to have as little idea as possible that anything had happened.
The Roku Test
The next test was one of the ones I cared about most. I went to an existing Roku Ultra and played The Mandalorian. I didn’t change the Roku configuration, point it at a new Plex server, or recreate a library.
It just worked.
This time I let it play normally rather than deliberately forcing a transcode. Plex reported:
Video: 1080p H.264 — Direct Play
Audio: EAC3 5.1 + Atmos — Direct Play
Subtitles: English Forced SRT — Direct Play
About 9Mbps, straight from the new Plex server.
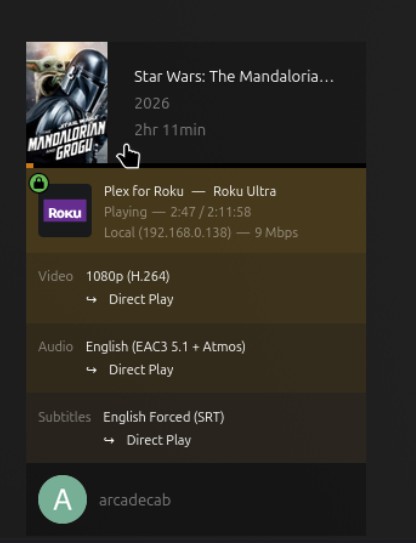
From the Roku’s point of view, PlexServer_Mint was still at .221 and still had the same media. It didn’t know, nor care, the machine serving it had been completely replaced.
What About Remote Access?
There was another reason I wanted to reuse .221. My router already had Plex’s manually configured external port forwarded to that address. If the new machine successfully inherited the old Plex configuration and the old IP address, I was hoping I wouldn’t have to touch that either.
I opened Remote Access in Plex.
Fully accessible outside your network.
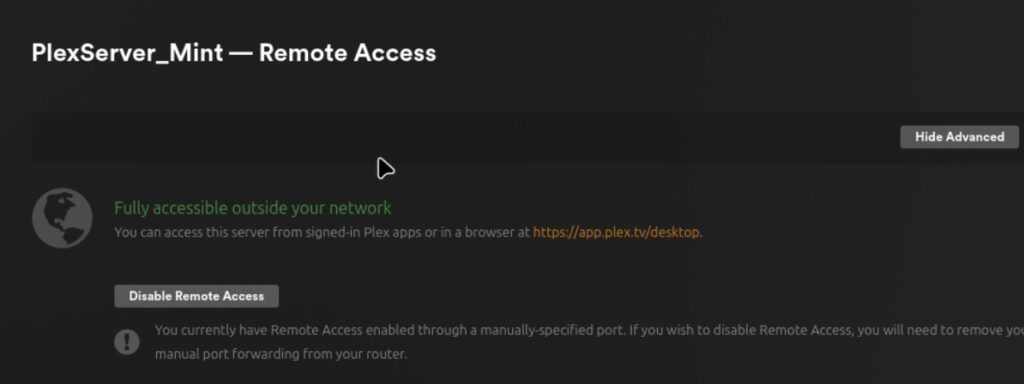
The existing manual port forwarding was still recognized and working. That was another fairly big box checked without actually changing anything.
And the DVR?
My Plex server also has another job that would have been very easy to forget during a migration: DVR. I have a few series, in addition to my Bears games, I record OTA. It uses a network tuner (HDHomeRun), has an existing recording schedule, and writes recordings to the DVR share on my OMV server.
I needed to make sure the DVR worked, so I looked at what was live, picked NBC Nightly News With Tom Llamas and started recording it. Plex immediately showed the recording in progress on the new server.
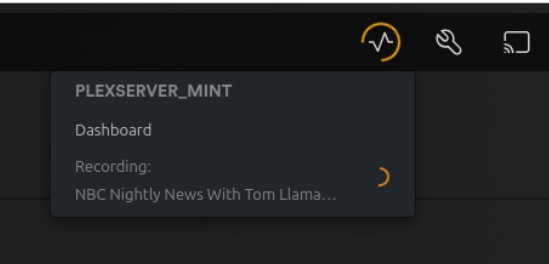
I stopped the recording, and the resulting recording appeared in my TV Shows-DVR library.
Then I played it, and it worked.
That test covered a fair number of things at once: the tuner, the migrated Plex DVR configuration, the recording schedule, access to the DVR SMB share, writing the file, adding it to the library, and playing it back again.

At this point Plex itself was looking correct, but I wasn’t finished quite yet. There was one more piece of the old server that I absolutely did not want to lose.
Tautulli
I have been running Tautulli alongside Plex for years. If you’ve never used it, Tautulli keeps much more detailed Plex usage history and statistics than I normally get from Plex itself. Over the years it had accumulated a lot of history, and I really didn’t want to start that over.
The old server was running a very old Tautulli installation, version 2.6.6. The current version I installed on the new server was 2.18.2. Rather than simply copying the entire old installation over the top of the new one, I decided to install a clean current copy and import the old database.
There was a minor logistical problem. The old VM was now shut down because the new VM had taken its .221 address. I didn’t want both of them on the network with the same IP address for obvious reasons.
So in Proxmox I disconnected the old VM’s virtual network adapter, started it while isolated, changed its address to 192.168.0.244, and then reconnected the adapter.
Now the retired server could temporarily exist alongside its replacement without interfering with it.
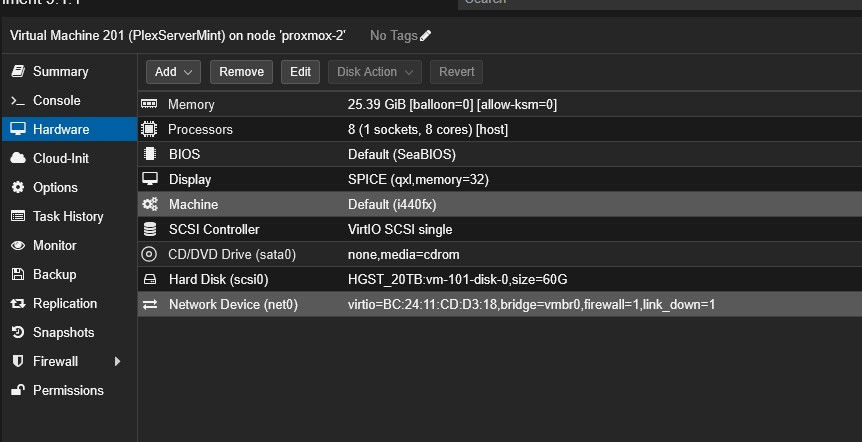
Before touching the old Tautulli database, I stopped Tautulli with sudo systemctl stop tautulli and made frozen copies of both its database and configuration file.
sudo cp /opt/Tautulli/tautulli.db /opt/Tautulli/tautulli.db.pre-migration
sudo cp /opt/Tautulli/config.ini /opt/Tautulli/config.ini.pre-migration
The database was about 64MB. I then copied those frozen files to the new server.
So at this point I had the original files on the old server, frozen backup copies on the old server, and another copy on the new server.
Yes, I was being a little paranoid about this particular database. That’s just me. In my line of work, me being paranoid is in everyone’s best interest.
A Fresh Tautulli
On the new server I installed the prerequisites, created a dedicated tautulli service account, and cloned the current Tautulli release into /opt/Tautulli. I also installed its systemd service.
The new Tautulli came up normally and walked me through its setup wizard.
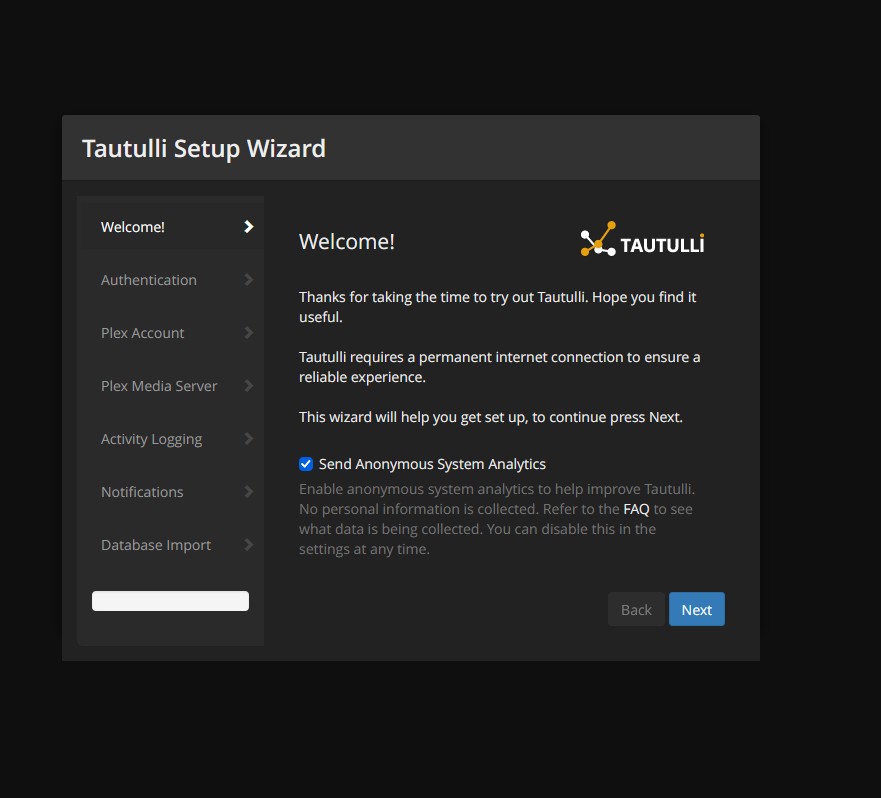
I took the opportunity to make one change from the old setup: I added authentication to the Tautulli web interface. The old installation hadn’t had any. No idea why, but it is possible the ancient version hadn’t required it.
When it came time to select the Plex server, something interesting happened. Tautulli discovered PlexServer_Mint at 192.168.0.244.
Um, nope!
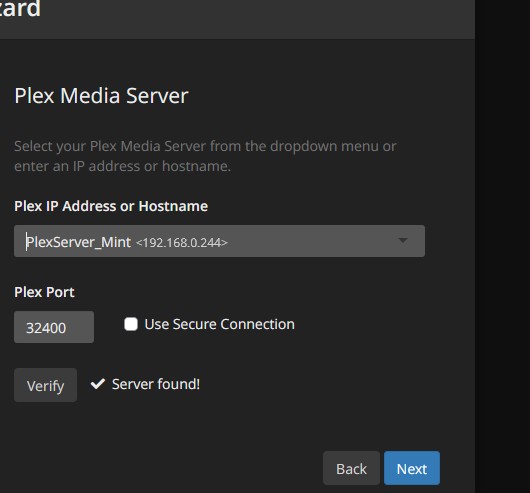
That was the old Plex VM I had temporarily brought back online so I could retrieve Tautulli’s data. Plex itself had apparently started when that VM booted. In hindsight, of course it did. That was by design.
I stopped Plex on the old machine. sudo systemctl stop plexmediaserver
Since Tautulli now runs on the same VM as Plex, I manually configured the new Tautulli installation to use: 127.0.0.1:32400
It found the correct Plex server immediately.
That is actually better than what I had before. Tautulli doesn’t need to go out onto my LAN and come back in to talk to Plex when Plex is running in the very same VM. The traffic stays local to the machine.
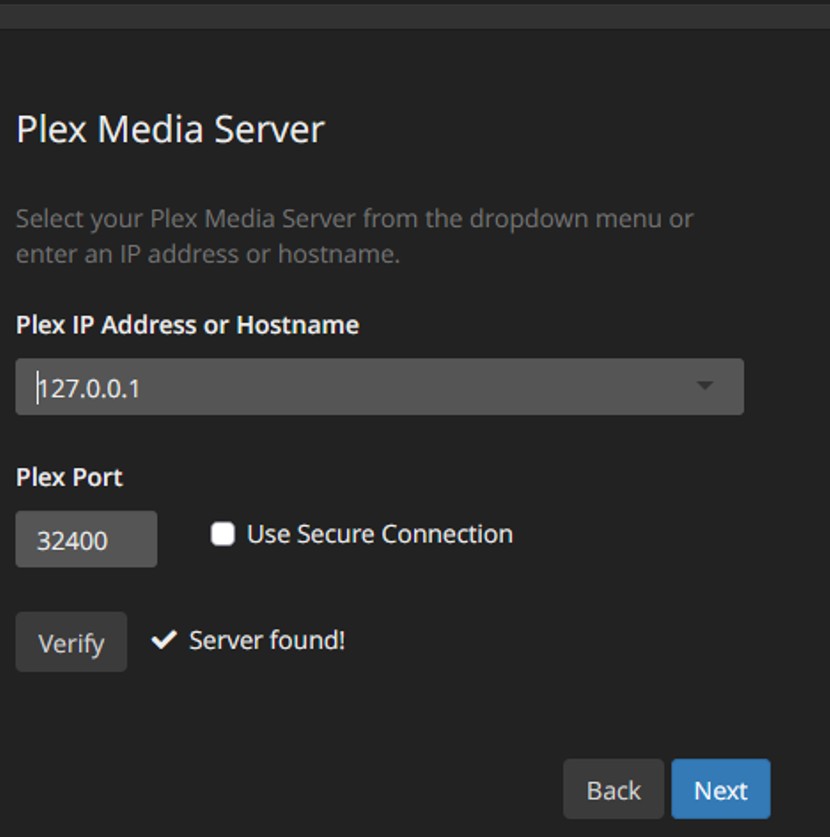
The new installation came up as Tautulli 2.18.2 and immediately started seeing current Plex activity. Great– except the statistics were empty.
Of course they were. I still needed the important part.
42,678 Reasons Not to Lose a Database
Tautulli has separate database and configuration imports. I deliberately did not import my old config.ini. I had just configured the new installation to use local Plex at 127.0.0.1, and I had added web authentication. Importing the old configuration could potentially undo improvements I had just made.
What I wanted was the history.
I copied my frozen old database into a location accessible by the new Tautulli installation and selected it from Settings → Import & Backups.
Because this was essentially a brand-new Tautulli database with no history worth preserving, I chose Overwrite rather than Merge and left Backup Current Database checked.
Then I started the import.
The log began spinning through the old database tables: session_history_media_info, session_history_metadata, sessions_continued, users, …and everything else. Finally:
Tautulli Database :: Optimizing database.
Tautulli Database :: Tautulli database import complete.
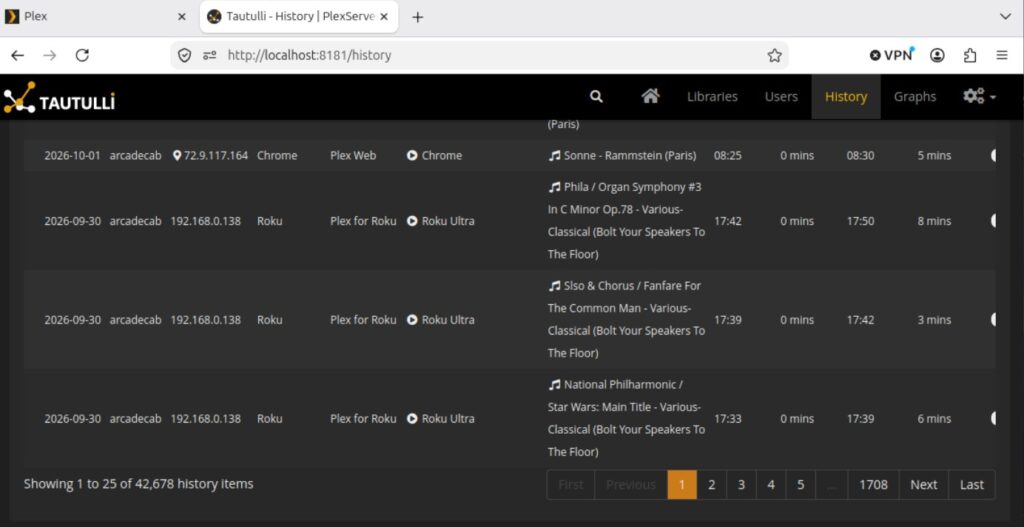
No errors, which sounded good. But I needed to confirm the history was there. I opened Tautulli’s History page, and there it was.
42,678 history items.
264 days, 16 hours and 54 minutes of total playback time.
And the history ran right up through the music I had been playing while doing this migration.
Rammstein and all.
I then enabled the new Tautulli service to start automatically at boot. sudo systemctl enable tautulli.service
Now I had one last test to perform.
Reboot It
Up to this point I had proven that everything worked while I was sitting there configuring it. But we all know the true test is whether it works after a reboot, so I rebooted the new Mint 22.3 VM. Thanks to the magic of buffering and the speed at which the VM came back online, the CD I was listening to via Plex in the browser as background music never stopped playing. Nice!
I checked the filesystems (df -h /media/Media /media/DVR /tmp/ramdisk):
Filesystem             Size  Used Avail Use% Mounted on
//192.168.0.242/Media   16T   14T  1.7T  90% /media/Media
//192.168.0.242/DVR     16T   14T  1.7T  90% /media/DVR
RamDisk                 16G     0   16G   0% /tmp/ramdisk
Both SMB shares had mounted automatically, and the 16GB RAM disk had been recreated. Plex was running, Tautulli was running with all of its history, and Plex continued playing music. That’s the kind of reboot test I like.
Boring.
With everything working after the reboot, I went back into Plex and re-enabled Empty trash automatically after every scan. I had disabled it before the migration so Plex wouldn’t remove anything if a media share disappeared during the move. With both shares mounting normally again, it was safe to turn it back on.

The Old Server Becomes the Old Server
With the reboot test complete, there wasn’t much reason to leave the old Mint 19.3 Plex VM running anymore.
I shut it down and renamed it in Proxmox so there would be absolutely no confusion later about which machine was which. I also disabled the old VM’s virtual network adapter and added a fairly obvious note reminding myself not to start it again. Plex and Tautulli are both configured to start automatically on that machine, and I don’t want the retired server accidentally coming back onto the network.
I’m not deleting it yet. Storage is cheap, and having the complete old server sitting there powered off is a pretty nice final fallback while I let the new machine run for a while.
I also deleted the temporary key pair from the new server with rm ~/.ssh/plex-migration ~/.ssh/plex-migration.pub. The corresponding authorized key still exists inside the old VM, but with that VM powered off and its network adapter disabled, it can’t be used remotely. If I ever bring the old VM back for recovery purposes, removing that authorization will be part of the process.

That was one bit of migration cleanup I didn’t see any reason to leave for later.
I also haven’t immediately deleted the fresh Plex directory I preserved on the new server, the temporary migration files, or the extra copies of the Tautulli database. I’ll clean those up eventually. Maybe. Or, maybe not.
And then, naturally, I made backups of the finished server. One normal Proxmox VE backup, and one PBS backup.
Because, of course.


Was All of This Really Necessary?
Probably not.
I could have built a new Plex server, mounted the media directories, recreated the libraries and called it done. The media itself wasn’t in danger. It lives on separate storage and is backed up elsewhere. But that wasn’t really what I wanted to preserve.
I wanted the Plex server I had already built over the years. I wanted the libraries, metadata, posters, watched status, DVR configuration, remote-access setup, transcoder configuration and everything else to simply continue on a newer, supported Linux.
I wanted the Rokus around the house, and the ones friends and family used at their own homes, to keep working without even knowing that the server underneath them had changed. And I really wanted those 42,678 Tautulli history records.
That’s why I spent so much time looking at file ownership, database files, dry runs and rsync statistics instead of simply installing Plex and pointing it at some directories.
The old server started this project on Linux Mint 19.3 with an installation that dated back to 2019. The replacement is running Mint 22.3, the current Plex Media Server, and the current Tautulli.
It still calls itself PlexServer_Mint and still lives at 192.168.0.221. The same Roku can play the same Mandalorian episode. The same DVR schedule can record the evening news. The same RAM disk handles my transcodes. And Tautulli still remembers what I’ve been watching and listening to for years.
From everything else in the house, almost nothing changed.
Which was pretty much the whole idea.
Leave a Reply